10 Easy Steps for Setting Up a VPN at Home
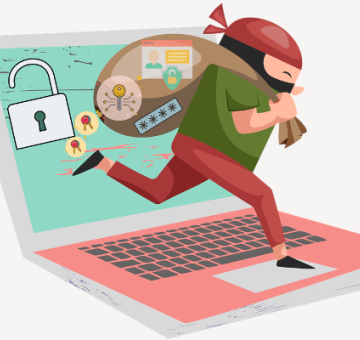
A virtual private network, or VPN, is akin to a secret tunnel that allows you to securely and covertly connect to another network through the vast expanse of the internet. Using advanced encryption techniques, VPNs provide an impenetrable barrier to prevent prying eyes from accessing sensitive data like financial transactions or personal information. So you can rest assured that when you're connected to a VPN, your information is kept safe from unauthorized access.
A VPN may offer protection and anonymity to your online activity from the comfort of your own home! You may be confident that no one can intercept your data or snoop on what you do because all of your internet traffic is routed through an encrypted tunnel. If you ever connect to an insecure public WiFi network, a VPN can provide an extra degree of security against hackers.
A VPN can also add an extra degree of security by hiding your IP address, making it difficult for websites and advertising to trace your activities. Overall, a VPN is a fantastic tool for anyone who wants to safeguard and protect their home internet connection!
Step1. Choose a VPN service
There is no better method to protect your online security and privacy than using a VPN. However, with so many VPNs on the market, it can be difficult to decide which one to use. That is why it is critical to conduct research and compare various solutions in order to locate the best VPN for you.
NordVPN is an excellent alternative for people seeking a dependable, fast, and feature-rich VPN service. It has a wide range of privacy regulations, server locations all around the world, and price levels to suit any budget. Trust NordVPN to provide you with the additional degree of protection you require and deserve in an online environment.
We are strongly recommending NordVPN as a fastest and having double encryption feature VPN service.
Step 2: Sign up for a VPN account
Ready to take your online security to the next level? Let's get started! Firstly, you'll need to choose a VPN service that meets your individual needs. Once you've done that, it's time to sign up and create an account. Here's how to do it:
- Head over to the VPN service's website and look for a 'sign up' or 'create an account' button.
- Then, follow the instructions and enter your personal information, as well as creating a username and password.
- In some cases, you may also be required to provide payment information for a paid VPN service.
- Make sure to keep track of all login details provided by the VPN service, such as server addresses or authentication keys.
And that's it! You're all set with your shiny new VPN account - safe surfing! You can successfully sign up for also for NordVPN account and get ready to start using them as your VPN provider.
Step 3. Install the VPN software
Ready to secure your online activities? Installing a VPN is the first step! It's easy too! Here's what you have to do:
- Download the VPN software: Head to the website of the VPN you've chosen and download the client software. It should work on Windows, macOS, iOS and Android devices.
- Install the VPN: Once the download is completed, simply open the installer and follow the steps to get the VPN client on your device.
- Launch the VPN: After the installation is done, launch the VPN from its app or desktop shortcut.
- Log in to the VPN: Take the login information you got when signing up for the VPN and use it to log into the account.
After all, you can successfully install the VPN software on your device and get ready to connect to a VPN server.
Step 4: Connect to a VPN server
Now that you have installed the VPN software on your device, it's time to connect to your VPN server! Let's get started with this step-by-step guide:
- Launch the VPN client: Swing open the VPN app on your device, which you'll find in the app list or on your desktop.
- Choose a server: Pick one of the server locations from the list on the VPN client. To connect more quickly, choose a location close-by. If your VPN allows it, you can even pick a specific server from the desired area.
- Hit the 'Connect' button: Once you've selected your server, click the 'Connect' button to begin the secure and encrypted connection.
Now all your internet traffic flows through the protected VPN! Good luck safely browsing on the web.
V. Step 5: Test the VPN connection
While you're connected to the VPN server, why not take a moment to test it out and make sure everything is working properly? Here's a few steps you should take:
Visit a website: Pop open a web browser and visit your favorite website - or why not try one that reveals your IP address (like whatismyip.com)?
Check your IP address: Once you're there, take a look at your IP address - it should be the VPN server's address, not yours.
Check the disconnection: To be completely sure, disconnect from the VPN and visit the website again - this time the IP address should be yours.
By following these easy steps, you can confirm that the VPN connection is up and running and your data is being securely routed through your VPN. If you experience any issues, feel free to reach out to the VPN service's customer support - they'll be happy to help out!
Step 6: Configure your VPN settings
Ready to customize your VPN connection? With a various range of settings, you can give your VPN connection specific touch. From automatic connection to startup settings and choice of technical protocols. Most likely you will have all the options you need to get the perfect connection. For extra protection, don't forget the kill switch feature - it'll automatically break your connection if the VPN drops, so you can browse with peace of mind. Get out there and start customizing your VPN today!
Step 7: Secure your home WiFi network with a VPN
Ready to add an extra layer of security and privacy to your home network? Setting up your home router to use a VPN is easier than you think - just follow these simple steps!
First, locate the VPN settings on your router in the “Advanced” or “Security” settings and enter the login details provided by your VPN service - server address, username and password. Then, enable the VPN connection on the router and restart it for the changes to take effect. Some times it will need some additional fine tuning, but it never goes very complicated.
To verify that the connection is established correctly, connect a device to the WiFi network and check if the VPN connection is working properly. Once you're done, all of your home devices will be safe, secure and private - no sweat!
Step 8: Use a VPN for specific activities
Adding a VPN to your online routine can be super helpful for a plethora of activities, from streaming content, to downloading files, to protecting your online banking info. Here's a rundown of most of VPN security features you can take advantage of:
Streaming content: Got your eye on a show that's only available in another country? With a VPN, you can access region-locked content with ease. Just connect to a VPN server in the appropriate location and you'll be able to watch whatever you want!
Downloading files: Make sure you stay safe and secure when downloading files. A VPN will encrypt your internet connection and mask your IP address, protecting your identity from hackers especialy in the public spaces.
Online banking: For extra peace of mind during your online banking activities, a VPN can provide an extra layer of security. With a VPN, your personal and financial information will be encrypted, keeping it safe from prying eyes.
Step 9: Disconnect from the VPN when not in use
Feeling sluggish and slow? Your VPN connection can to drag down your internet speed! It is really easy to disconnect from the VPN when you're not using it. To stop the VPN server simple hit the "Disconnect" button in the client to cut the connection. Once you're disconnected, you can close the client to free system resources.
By disconnecting from the VPN when idle, you're unplugging from the safe connection and unlocking the full power of your internet connection. You don't have to worry about a limited data plan or running out of data with a data-limited VPN.
Conclusion (as Step 10)
In conclusion, using a VPN at home can be a great way to supercharge your security and privacy. It's like having your very own guard dog - protecting your sensitive data, like financial transactions and personal information, from any unwanted eyes. With a VPN, you can also tap into region-locked content and dodge pesky targeted ads.
Setting up and using a VPN may seem intimidating at first, but it's really quite simple! We've put together this guide to walk you through every step of the way. So go ahead, give it a shot - you'll be streaming, downloading, and banking away safely and securely in no time.
Don't wait around - now is the time to get your own personal security guard set up and protecting you online. With the added safety and privacy of a VPN, you'll be thanking yourself in the long run!
After all we said above we are strongly recommending NordVPN as a VPN service provider
Recommended Posts